Wednesday, July 25, 2012

Roasted Beet Salad

It's been far too long since I've posted a recipe. I've only done one so far this month! I finally have some days off coming up in which I have nothing to do. Nothing! It'll be wonderful spending quality time with my little man, working in the garden, and playing in the kitchen. Oh and wine. I plan on drinking lots of wine, starting right now. I'm in full relaxation mode (that's extremely rare), laying in bed between my new, crisp organic cotton sheets (that I finally replaced my old, worn out ones with), sipping a glass of vino that I'm trying my best not to spill, and doing what I do best.. talking food.

I've been harvesting various veggies from my garden, but none are as prolific as the beets. They're low maintenance, fast growing, and produce 9 per square foot. This recipe was the first time I cooked them. I usually juice them or chop them raw into salads, and I didn't realize how tasty they could be! If I wasn't so comfy in bed I'd be having a midnight snack in the kitchen right now.

This recipe is from a pin I pinned on Pinterest (ha.. that's fun saying out loud), I only slightly changed the preparation method and left out the salt and pepper originally called for. The beets are delicious enough without enhancement!


Roasted Beet Salad
Serves 2


  • 4 beets, washed and stemmed
  • 2 Tbsp. balsamic vinegar
  • 2 Tbsp. olive oil
  • Small handful of walnuts


  1. Preheat the oven to 400º.
  2. Peel the beets and wrap each individual one in tin foil.
  3. Roast in the oven for one hour.
  4. Remove from the oven and allow them to cool until they're not too hot to handle.
  5. Chop roughly into chunks and place in a bowl.
  6. Toss in the remaining ingredients.
  7. Refrigerate before serving.


Home Grown Part 5: caterpillars, beetles and grubs.. Oh my!

Holy pests. They've just about wiped out my squash bed. Last week I was harvesting a zucchini or two a day, but about half of my plants have died since then. I spent the evening ripping out the dead plants, and was sad to see some of my ripening winter squash get ripped out with them. Take a look at the pictures below. I think squash bugs are the culprit, but I'm not sure. 
I had to rip up all the plants with rotted stems.
Gross, fat larvae have taken over the stems.
These pretty but obnoxious caterpillars (juvenile squash bugs?)
are munching my leaves.
An adult squash bug maybe? I've been picking these off the plants for weeks.
It's a bummer this spaghetti squash had to go.
This one, which was growing up the side of the shed, had to go, too.
The butternut squash plant survived though!
If anyone has any organic pest control methods for these specific bugs I'd love to hear them. My once very prolific squash bed has been reduced to a few vines. Logan is still being an excellent helper though!
He's learned to aim the hose at the plants instead of me..

.. but spraying the fence is fun too apparently.


I planted new seeds in place of the old plants. To be honest, I'm pretty sick of the yellow summer squash (I roasted the last of the harvest for dinner last night), so I planted cucumber seeds in their place. The goal is to make pickles! The seed packets say squash and cucumbers can be planted through July, so hopefully it's not too late for them. I did the same thing with peas, replanting pea seeds after harvesting the last bunch, but that's not working out so well. The peas are flowering and producing pathetic pea pods before the plants have a chance to really grow. It may be too late in the season for peas. Boo.
Puny peas

The rest of the garden is coming along beautifully. Check it out!

I've been harvesting beets and carrots from this bed, and check out that beautiful basil!
Tomatoes gone wild. I should have staked these, because they're really taking over.
My poor beans have completely disappeared underneath them.

This is supposed to be a pepper plant, but I think it's an impostor. Any guesses as to what it is? 
Follow the rest of my garden progress, with parts 1, 2, 3 and 4.

Sunday, July 8, 2012

Raw Vegan "Cheese"cakes

I've been posting (and eating) a lot of sugary desserts lately, so I figure it's time to take a break from those and make a dessert that's actually good for you. The desserts I usually post are healthier than traditional ones, as they have substitutions like coconut oil for butter, and apple purée for eggs, but they're still not exactly health food. These "cheese"cakes actually can be considered healthy and nutritious, and they're delicious! It's a win win!

I've made them in mango and strawberry flavors, but I bet most fruits would be delicious. Blueberry is next on my list. I made these in muffin tins lined with unbleached baking cups (I always walk out of Wild By Nature with something new), but I bet this recipe would work in a traditional cheesecake springform pan. I'll try it for Andrew's birthday next week and fill you in. He was a big fan of the strawberry ones!

I prepared the crust exactly as directed in the original recipe. I've tried other raw vegan crusts, but this one is by far the best. I even got over my intense dislike of stevia for use in the filling and found a brand that doesn't make me gag!

Non-nausea inducing Stevia
The original recipe called for coconut oil and cocoa butter.
I don't have the latter, so I improvised and used coconut butter.
Tasty medjool dates from Blue Mountain Organics.
I went a little nuts recently in their online store.
It's best to freeze these, then let them sit on the counter for a couple minutes before serving.


Raw Vegan "Cheese"cakes
Makes 12 cupcakes

Crust:

  • 1 cup raw almonds
  • 1/4 cup packed medjool dates, pitted
  • 1 tsp. water
  • Pinch of salt


  1. Grind the almonds in a blender or food processor. Be careful not to over grind them, stop when you reach a crumb consistency.
  2. Roughly chop the dates and grind them in with the almonds until they have turned to crumbs also.
  3. Add the water and salt and grind again until a dough forms.
  4. Press this dough into the bottom of lined muffin tins.


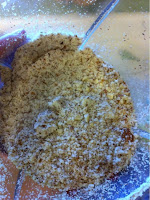
Almond crumbs
The crust in the muffin tins
Filling:

  • 2 cups chopped fruit, such as mangos, strawberries or blueberries
  • 1 cup cashews
  • 3 Tbsp. agave
  • 2 Tbsp. lemon juice
  • 4 drops of liquid stevia
  • 1 vanilla bean, scraped (vanilla extract could work, too)
  • 4 Tbsp. coconut butter, melted


  1. Blend all the ingredients in a blended or food processor until everything is thoroughly mixed.
  2. Pour over the crust, and freeze for a few hours until firm.


Saturday, July 7, 2012

Home Grown Part 4: Everything ripening at once

My squash bed seems to have grown rapidly overnight. When I looked under the leaves I was really surprised to see so many ripe zucchini and summer squash. They were just tiny little things the last time I checked, which was only a day or two ago. I even have some winter squash starting to form. I didn't expect to see them so soon!
Overflowing squash bed
Zucchini, ready for picking
And another
The harvest
A winter squash. I bought the seeds in an assorted pack,
so I'm not sure what kind it is yet. Spaghetti, maybe?
I'm not sure what I'm going to do with this abundance of squash. I've already made crock pot chili and zucchini brownies, and there are still plenty of leftovers. We'll be eating squash everyday for the rest of the summer!

The same goes for beans. I peeked under the leaves and couldn't believe how many were under there! I planted the beans in intervals, so some plants are in full production, while others have just sprouted. I don't have any recipes for them though. In fact, I don't even like them cooked, so I just eat them raw.

Bush beans
Tasty snack

My pea plants reached the end of their fertile days, so I ripped them up and planted new ones. I'm not sure if it's too late to plant them, especially since I planted the first seeds back in April. A couple plants have sprouted, so we'll see!

The garden bed looks so empty without the peas climbing up the driftwood.
Follow my garden progress, with parts 1, 2 and 3 here!